Quick Start
This guide will help you get started with PGVecto.rs Cloud. First, you need to sign up for a PGVecto.rs Cloud account. If you haven't done so already, you can sign up for a free account here.
Create a cluster
TIP
You can only create Enterprise plan after you bind a credit card.
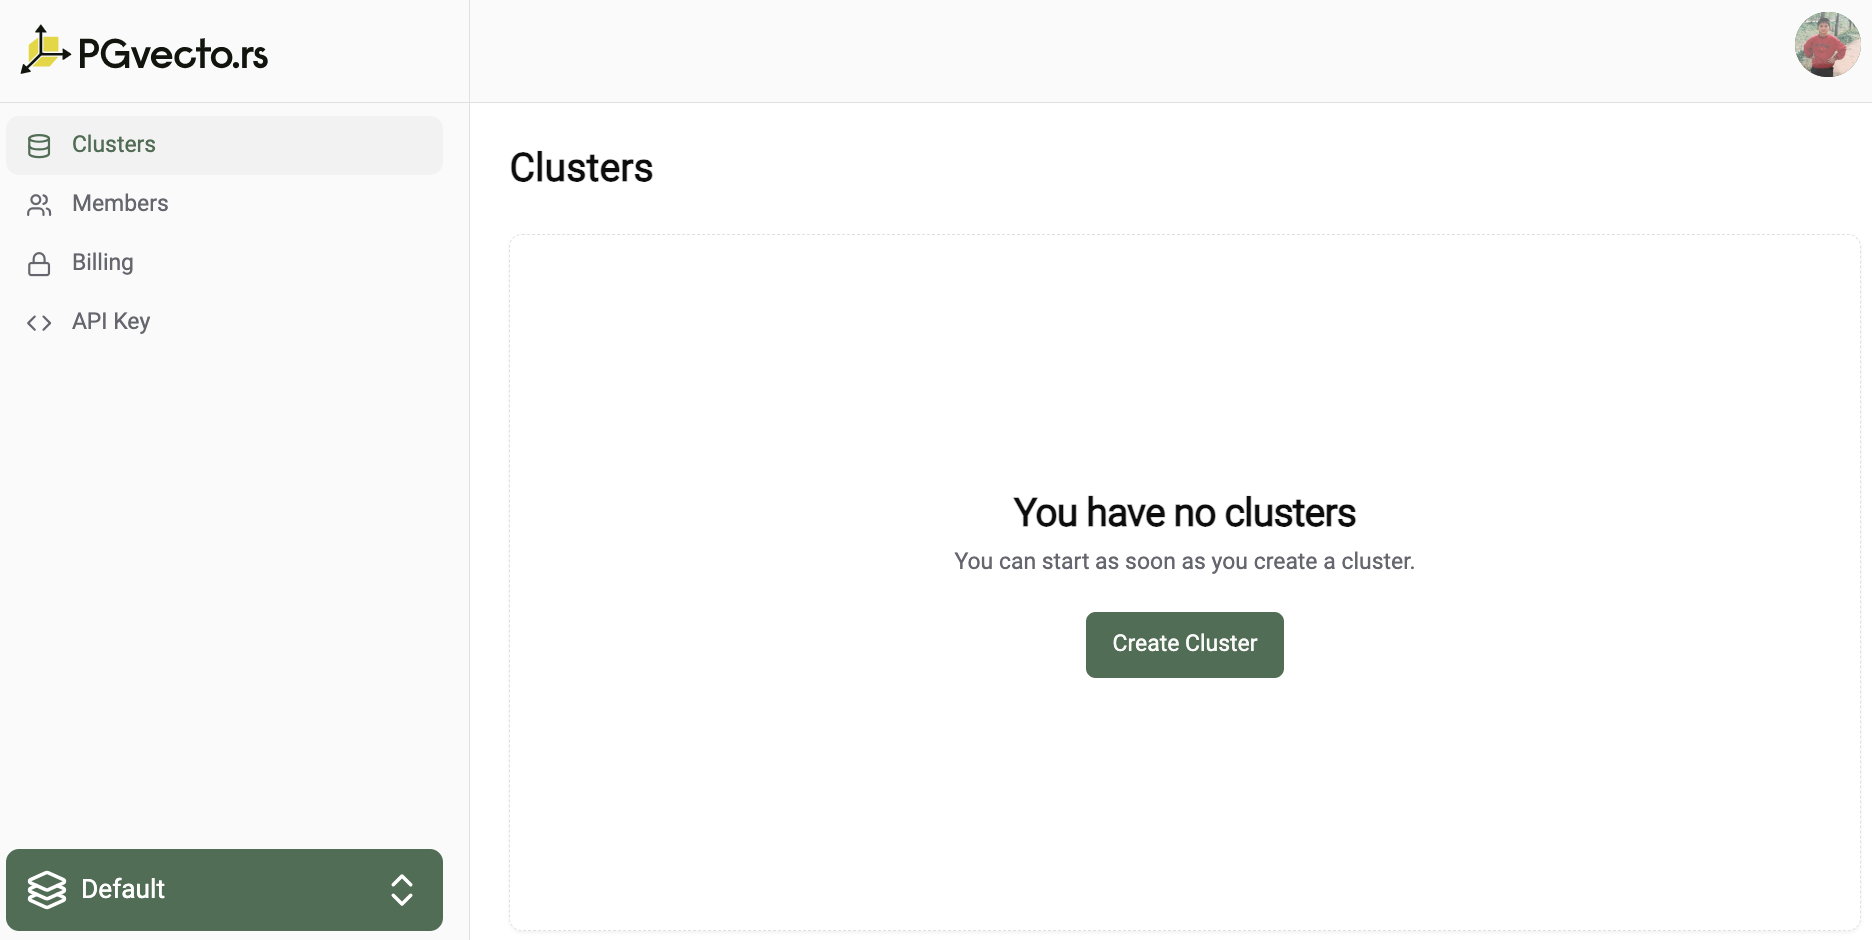
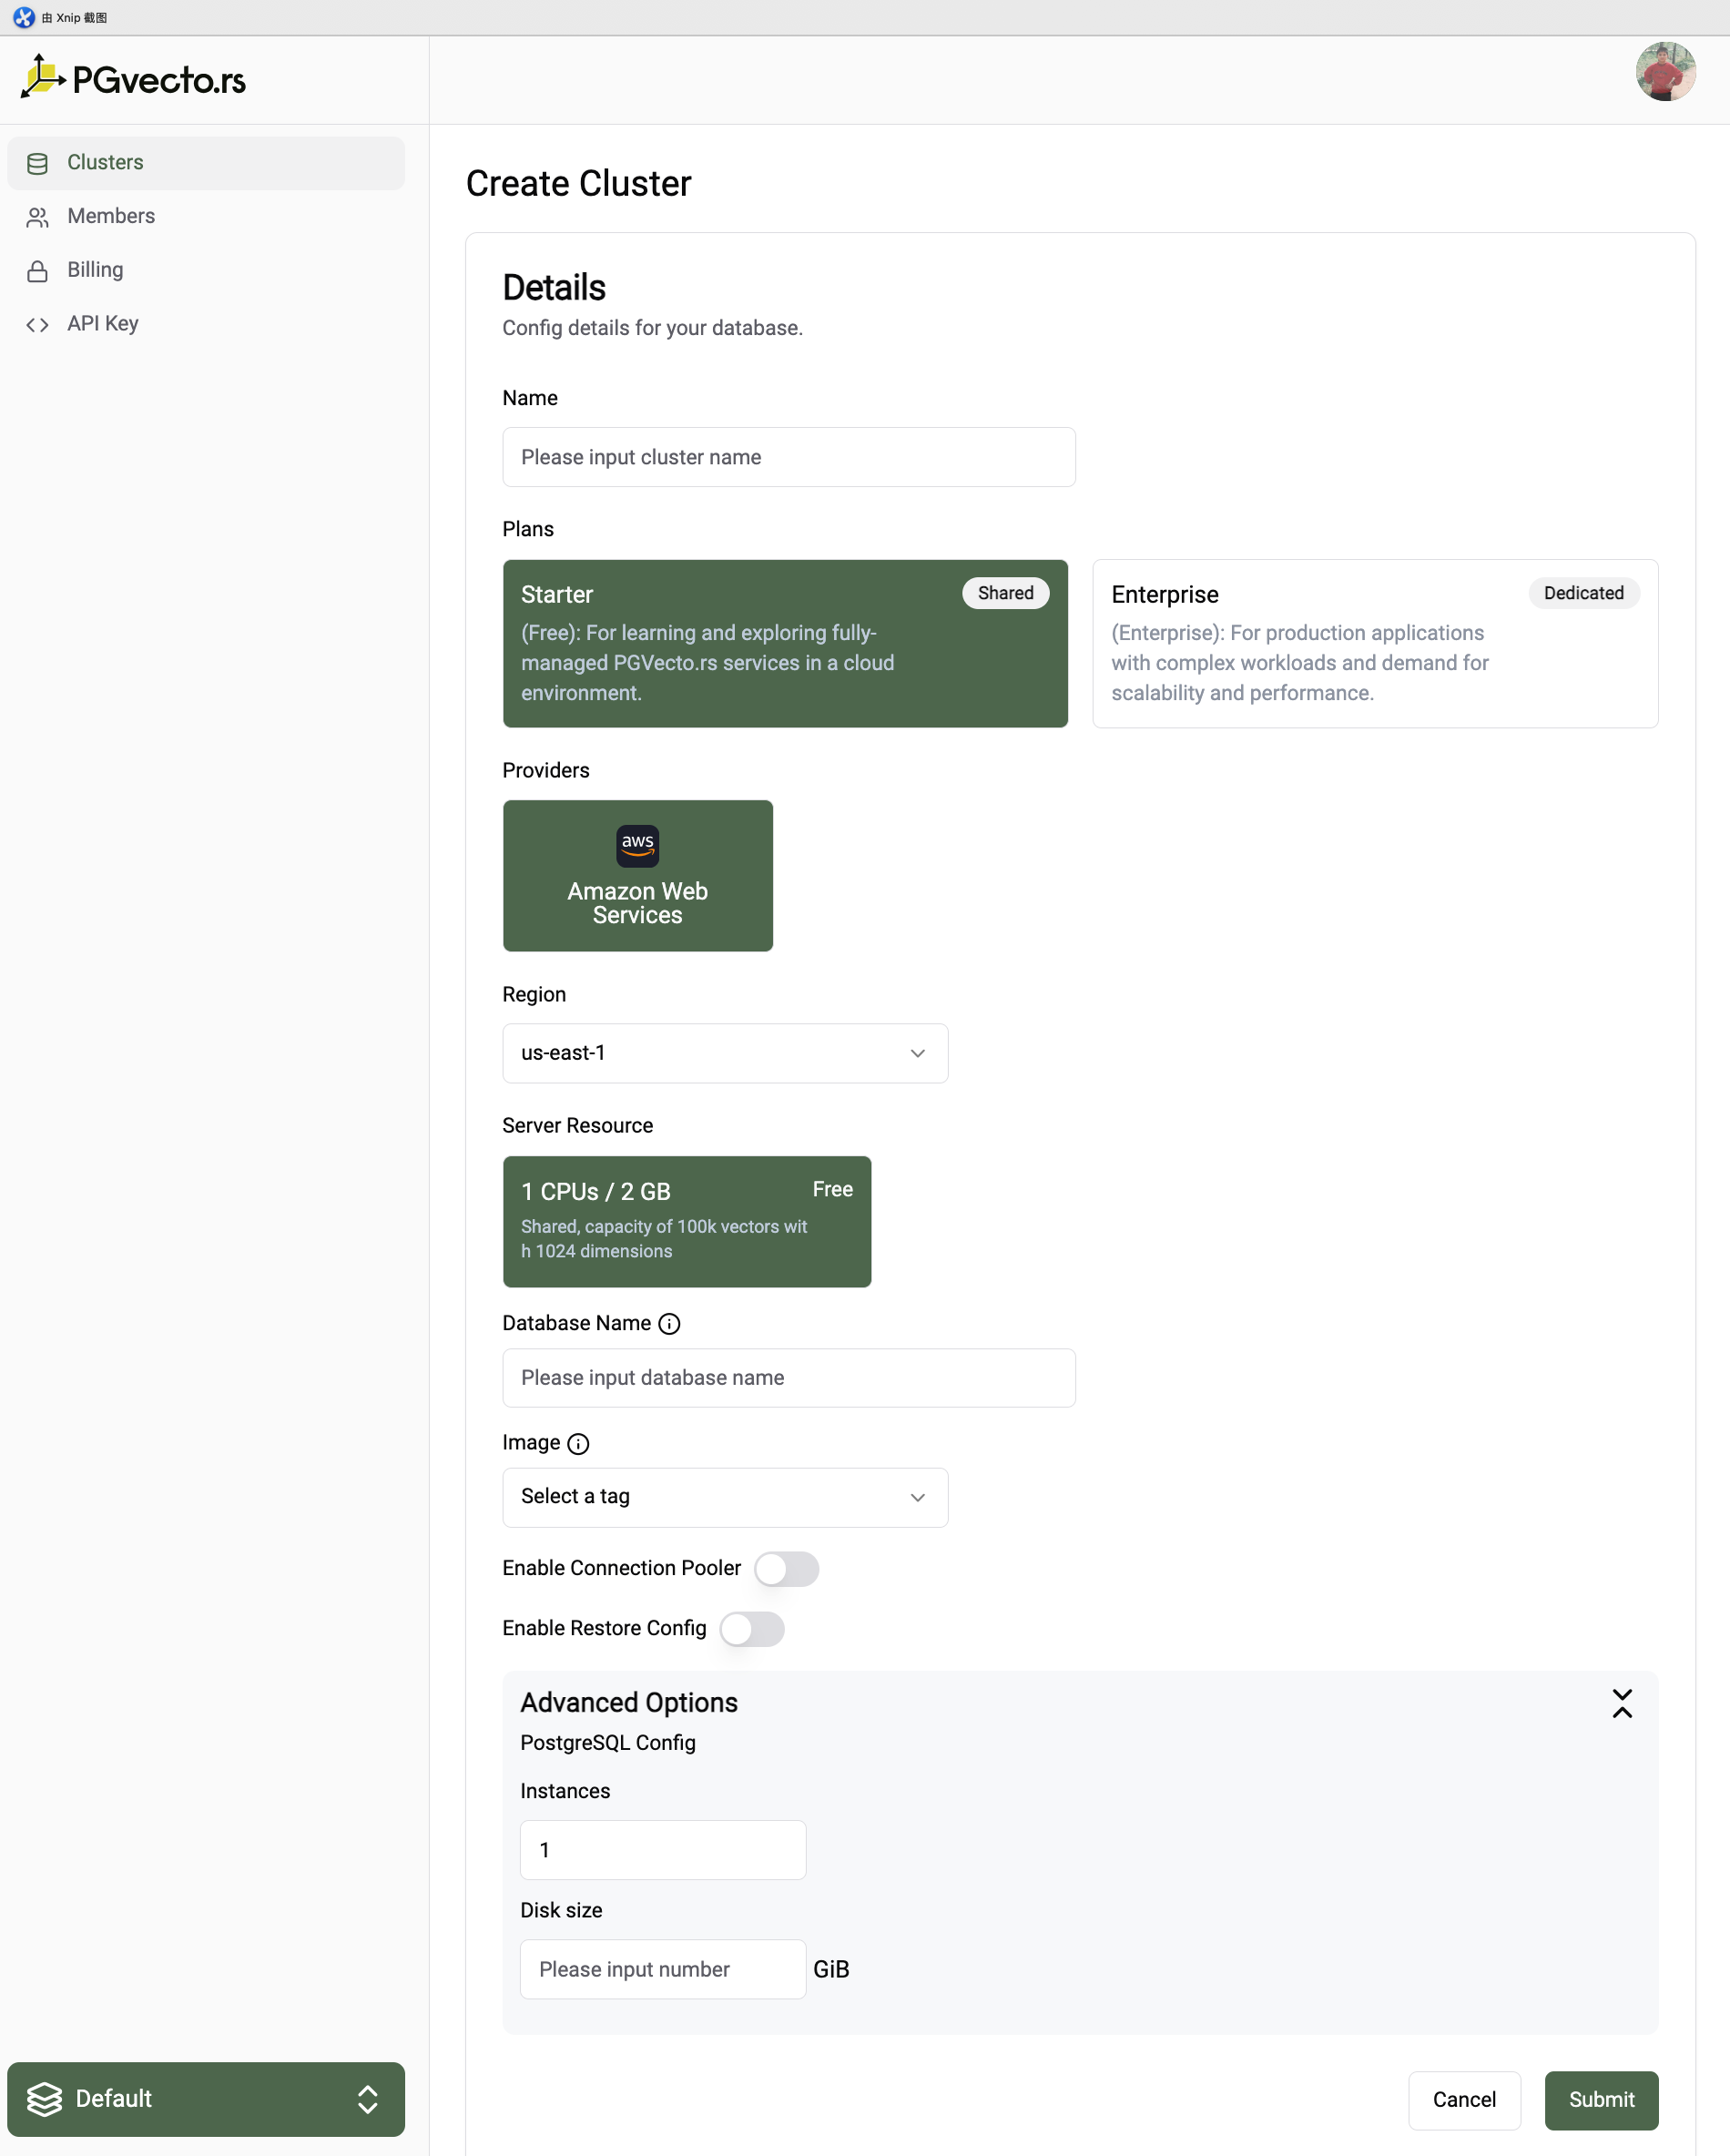
To create a new cluster, navigate to the PGVecto.rs Cloud Console and click on the "Create Cluster" button.
You need to specify the following information:
- Required:
- Cluster Name: A unique name for your cluster.
- Plan: The plan you want to use for your cluster, for information about Cloud's paid plan options, see Cloud plans.
- Cloud Provider: The cloud provider where your cluster will be deployed, currently only AWS is supported.
- Region: The region where your cluster will be deployed.
- Server Resource: The server resource for your cluster, currently only one option is available.
- 1C/2G: Free tier, 1 core CPU, 2GB memory and 3Gi disk space.
- 2C/8G: Enterprise tier, 2 core CPU, 8GB memory and 15Gi disk space.
- 2C/16G: Enterprise tier, 2 core CPU, 16GB memory and 15Gi disk space.
- 4C/32G: Enterprise tier, 4 core CPU, 32GB memory and 90Gi disk space.
- Database Name: The name of the database that you will store vector data in.
- Image: We provide a tag in a semantic version format, for example 16-v0.3.0-alpha4-vectors:
- 16 indicates the version number of Postgres major
- v0.3.0-alpha4 indicates pgvecto.rs version number
- vectors indicates the installation location of pgvecto.rs scheme, optional vectors, extensions, public. Please choose public if you want to use PGVecto.rs Cloud on AWS RDS. If you're going to use fdw on Supabase, please choose extensions.
- Optional:
- Enable Connection Pooler: (default: false): Enable the connection pooler for your cluster.
- Enable Restore Config: (default: false): Enable the restore config for your backup created in other clusters.
- Disk Size: Postgres PGData disk size, will change the default disk size.
- Instances: The number of instances in the cluster. The default is 1.
WARNING
Currently, vector index not support streaming replication.
Cluster Info
After creating a cluster, you will be directed to the cluster info page. Here you can find the details of your cluster, such as the connection string, the status of the cluster, and resource usage of the cluster.
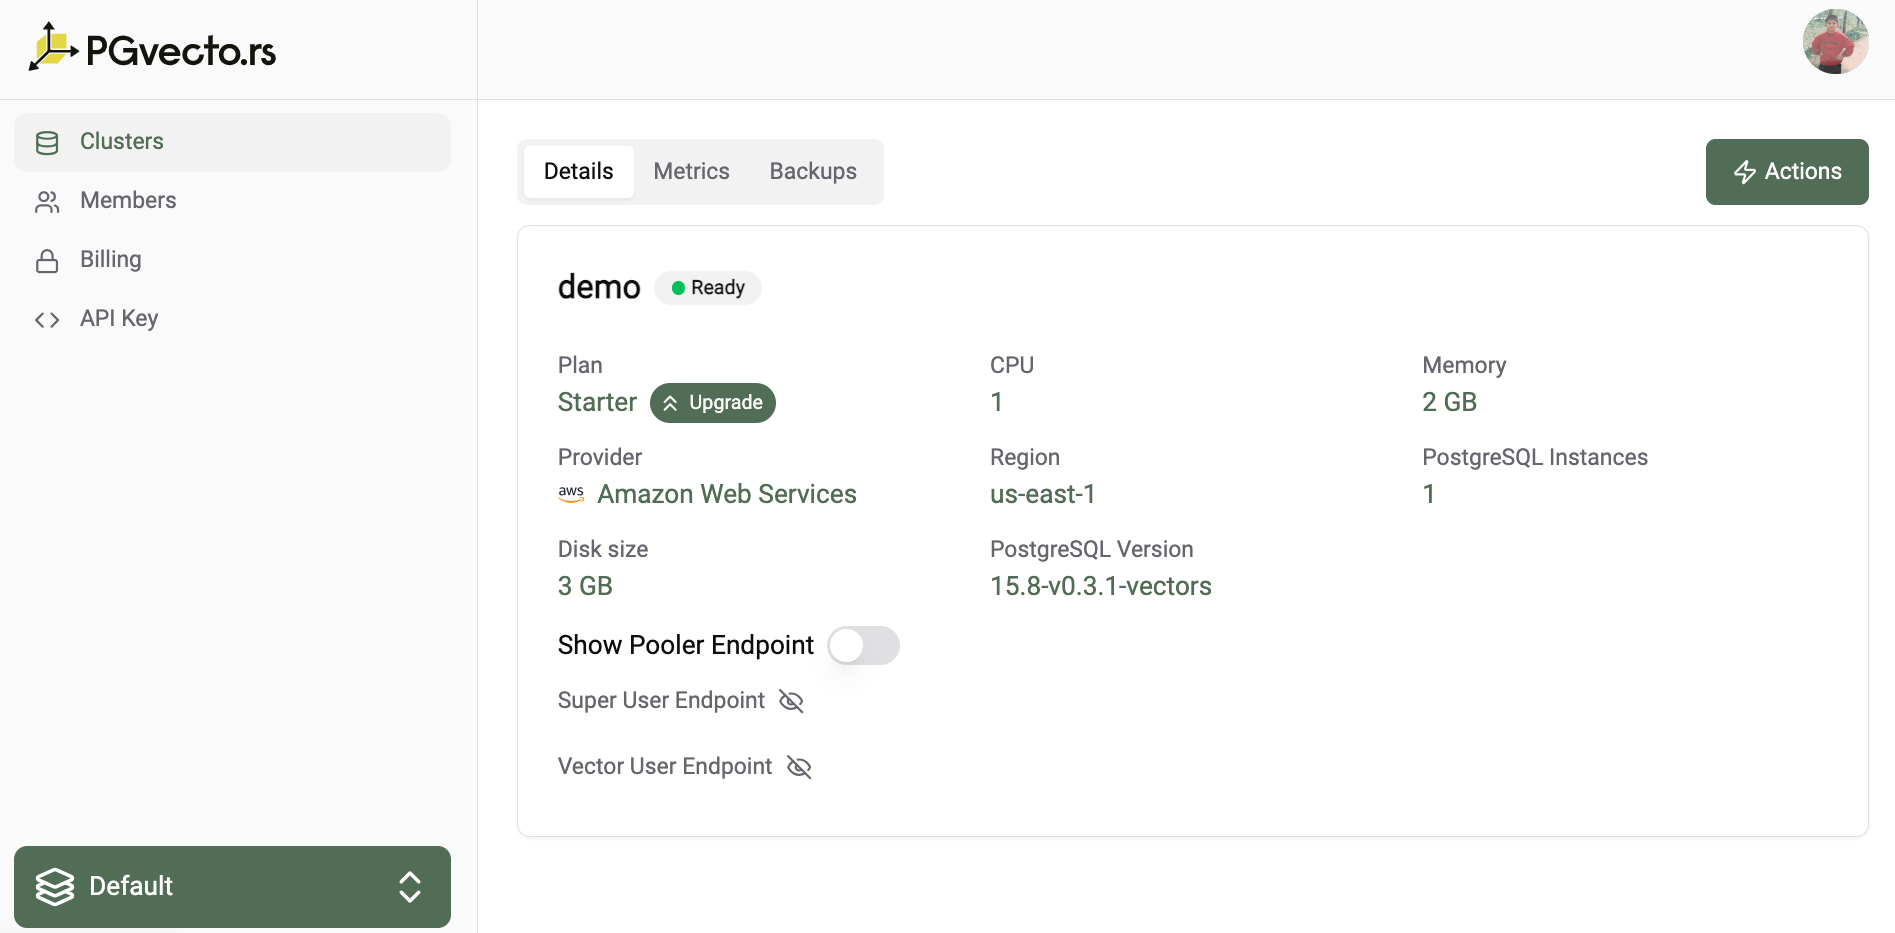
We provide two types of connection endpoints, Super User Endpoint and Vector User Endpoint respectively. For more information about the two types of connections, see Connecting with psql.
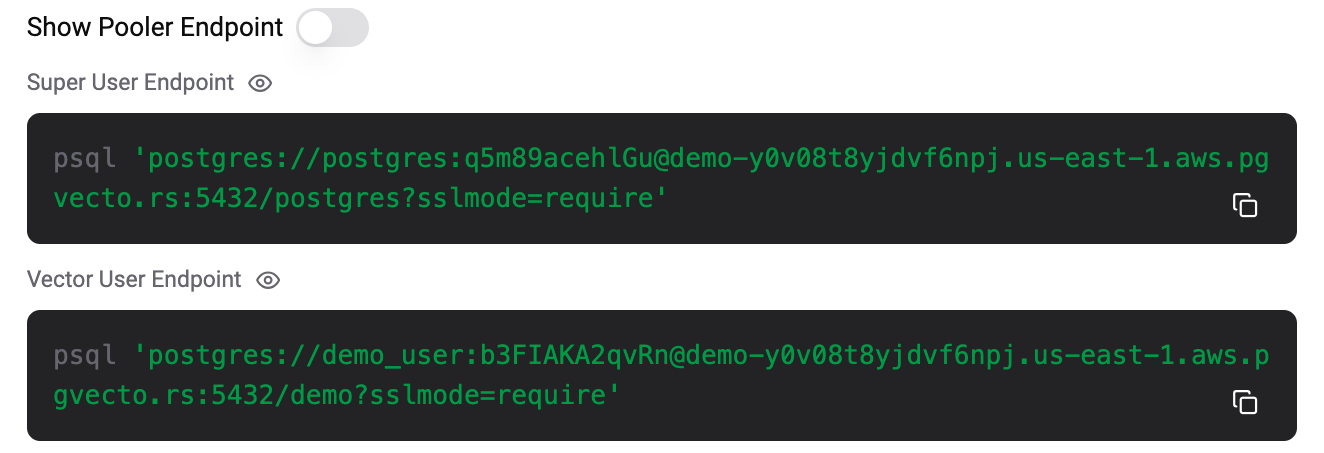
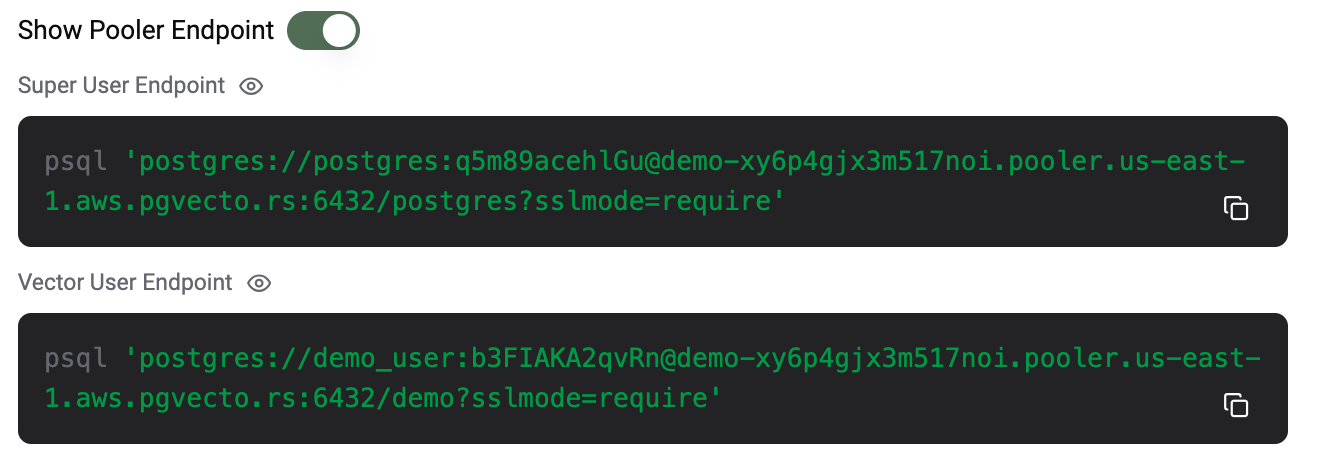
If Enable Connection Pooler is selected when create cluster, you can get the pooler connection endpoint via clicking the Show Pooler Endpoint button.
Connect to the cluster
To connect to the cluster, you can use the provided connection strings. You can connect to the cluster using the psql command-line tool. For detailed instructions on how to connect to the cluster, see Connect to PGVecto.rs Cloud with psql. After connecting to the cluster, we can execute the following SQL query \dx to validate you have successfully installed the vectors extension.
$ psql 'postgres://demo_user:b3FIAKA2qvRn@demo-y0v08t8yjdvf6npj.us-east-1.aws.pgvecto.rs:5432/demo?sslmode=require'
psql (15.3, server 15.8 (Debian 15.8-1.pgdg110+1))
SSL connection (protocol: TLSv1.3, cipher: TLS_AES_256_GCM_SHA384, compression: off)
Type "help" for help.

demo=> \dx
                                                 List of installed extensions
  Name   | Version |   Schema   |                                         Description
---------+---------+------------+----------------------------------------------------------------------------------------------
 pgaudit | 1.7     | public     | provides auditing functionality
 plpgsql | 1.0     | pg_catalog | PL/pgSQL procedural language
 vectors | 0.3.1   | vectors    | vectors: Vector database plugin for Postgres, written in Rust, specifically designed for LLM
(3 rows)
Create Index
In quick start, we will create a simple index. If you want to create a more advanced index, see Reference. We provide rich user cases, see Use Cases.
demo=> CREATE TABLE test (id integer PRIMARY KEY, embedding vector(3) NOT NULL);
CREATE TABLE
demo=> INSERT INTO test SELECT i, ARRAY[random(), random(), random()]::real[] FROM generate_series(1, 100) i;
INSERT 0 100
demo=> CREATE INDEX ON test USING vectors (embedding vector_l2_ops) WITH (options = "[indexing.hnsw]");
CREATE INDEX
demo=> SELECT * FROM test ORDER BY embedding <-> '[0.40671515, 0.24202824, 0.37059402]' LIMIT 10;
id | embedding
----+--------------------------------------
56 | [0.4123775, 0.2756525, 0.28814396]
87 | [0.4704818, 0.31425253, 0.3778398]
50 | [0.33713394, 0.30857348, 0.49273673]
51 | [0.45640728, 0.07145179, 0.3509347]
5 | [0.26704347, 0.12765166, 0.36489958]
55 | [0.33462214, 0.38698882, 0.2650288]
15 | [0.46958137, 0.2228874, 0.5682492]
11 | [0.4134086, 0.07931474, 0.52571136]
21 | [0.524073, 0.42092547, 0.2687532]
14 | [0.21973, 0.2737943, 0.5358521]
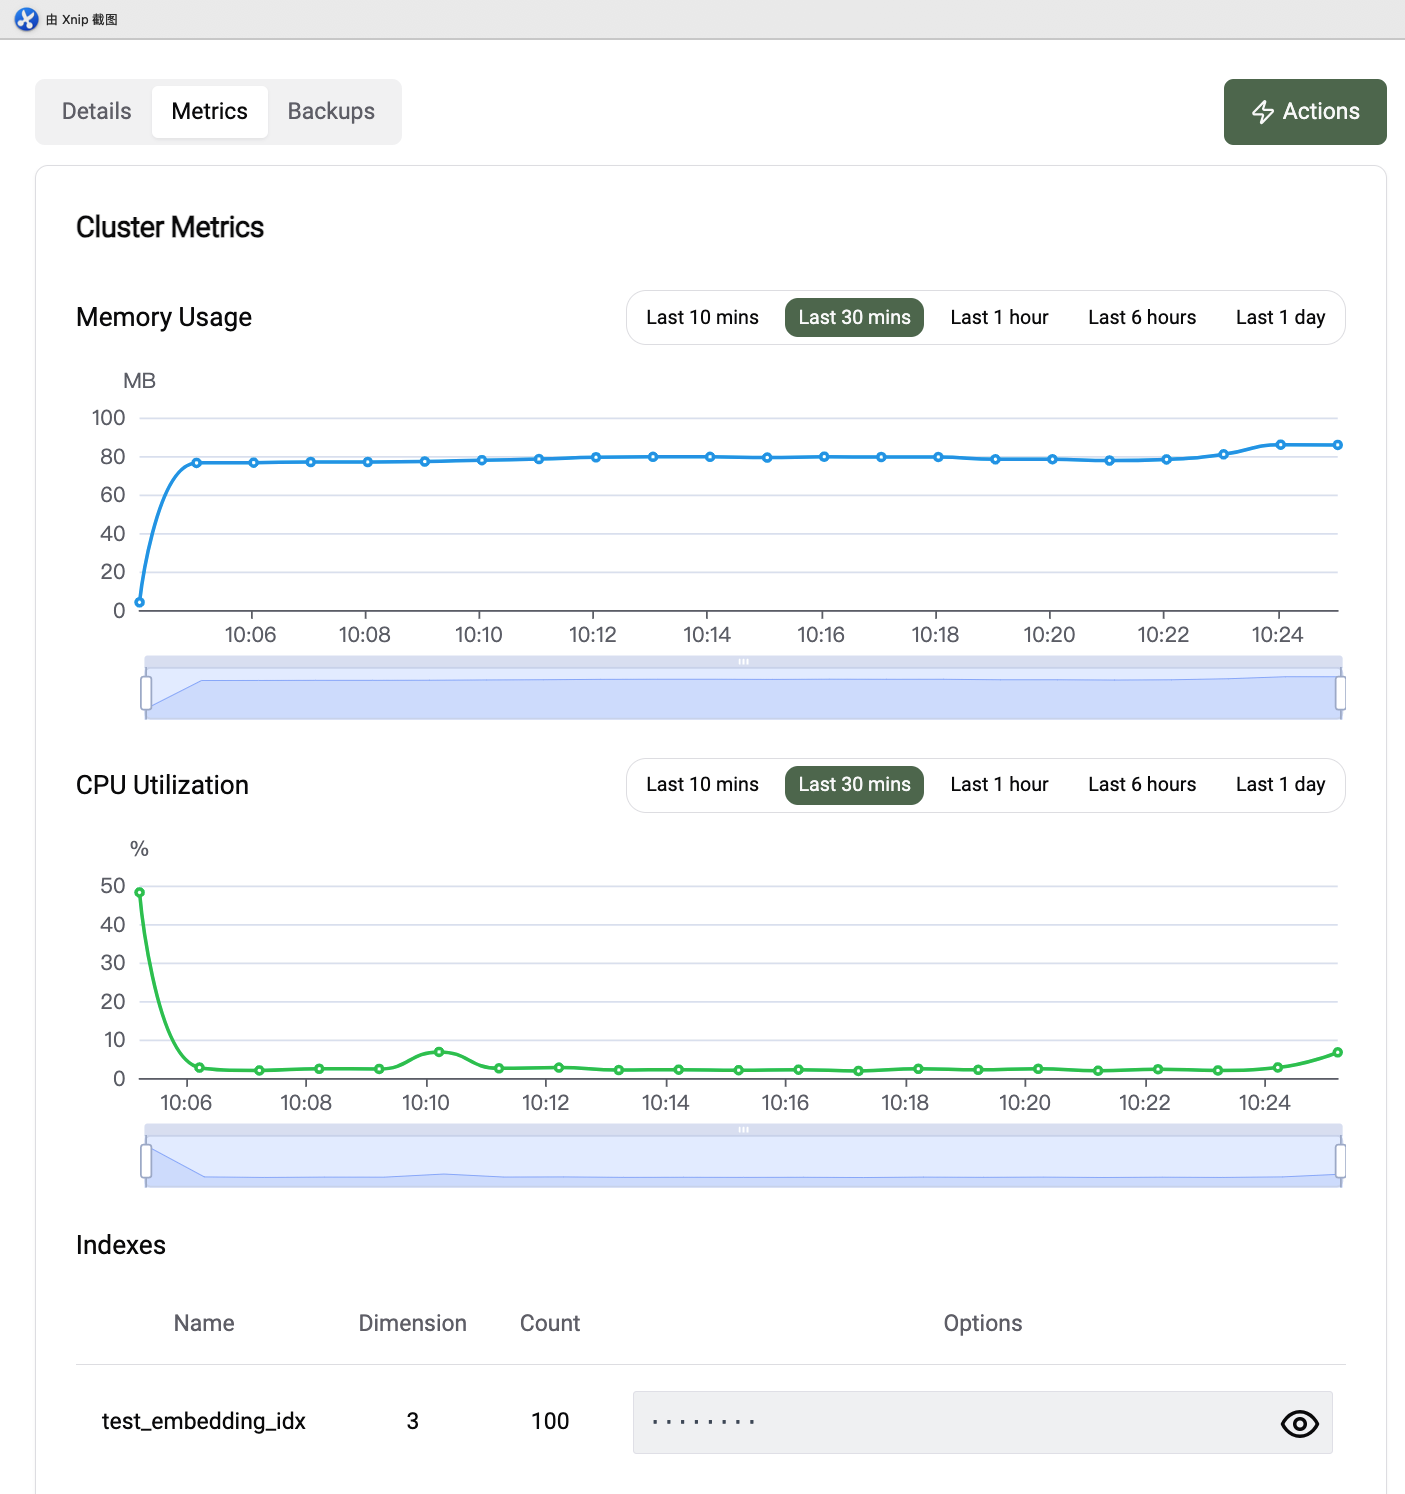
(10 rows)Monitoring
You can view the cpu and memory usage of your cluster in the cluster info page, and you can also view the index info for example the number of vectors in the index, the dimension of the vectors etc. For detailed information about monitoring, see Monitoring.